This chapter contains the following topics:
The Prepare deposits selection enables you to identify which cash receipts are in each deposit and which cash account received each deposit. Tying this information together is an important part of maintaining the balance of each bank account, verifying the accuracy of the bank statements, and controlling the flow of cash in your business.
The Deposit summary selection prints a report of these deposits.
The Print deposits selection enables you to print a deposit slip that can be used to verify entries and actually accompany your deposit. (You will still need your MICA encoded deposit slip as a summary document for bank processing.)
Before using these functions, you must have entered the basic set-up information for your bank account (refer to Bank Accounts chapter) and have entered and posted your cash receipts for individual customers. See the Cash Receipts chapter.
Check Reconciliation Interface
If you are using Check Reconciliation and you want to interface to it you must have it setup and ready to receive data. There is a procedure you may follow to have it set up properly. See the Starting up a checkbook chapter in the C/R user documentation for more information.
If you are setup for using PBS Check Reconciliation and you are in Regular mode, the entry and posting of cash receipts and printing of deposit slips must be completed in order to transfer your deposit information.
Depending on how the Check Reconciliation Control information is set up, transfers to C/R may be done one of two ways:
| 1. | You may use the Transfer checks/deposits function to pull your deposits into Check Reconciliation following the printing of the deposit slip. |
| 2. | You may transfer the deposits automatically into C/R when the deposit slip is printed. |
To prepare a deposit slip, select the cash account, enter the deposit slip number and date, and then select the date range of cash receipts to include on the deposit slip.
Select
Prepare deposits from the Deposits menu.
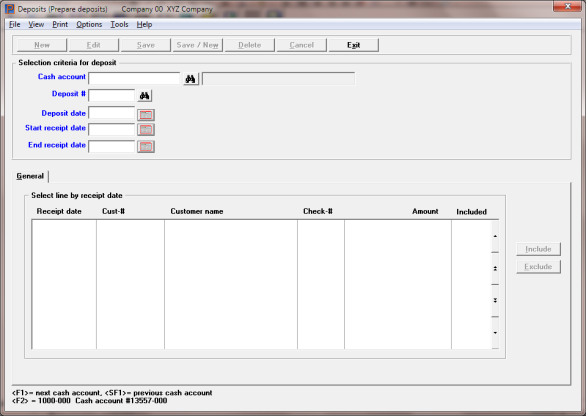
The following screen appears:
Graphical Mode

Character Mode
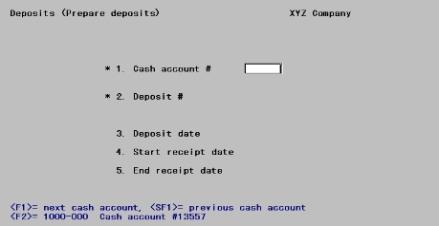
From this screen, you can work with new or existing deposit slips.
Enter the information as follows:
Enter the cash account number for this deposit. Any valid cash account previously defined in the System Manager (CTL) Cash accounts selection is accepted. Usually the account will also be defined in A/R Bank accounts selection, but this is not a requirement. For instance, you might want a deposit slip when you transfer payments received in currency to the petty cash fund.
Options
You may use one of the options:
|
<F1> |
For the next valid cash account. The <F1> and <SF1> entries are not available if only one cash account has been defined. |
|
<SF1> |
For the previous cash account |
|
<F2> |
For the default cash account from Control information |
|
<F8> |
Select a cash account from the lookup |
Note the absence of a delete button. Deposit slips remain, even after the deposit slip has been printed and the deposits have been transferred to the C/R module (if used). They can only be purged by running the Cash History report, as described in the Cash History chapter.
|
Format |
Your standard account number format, as defined in CTL Company information |
|
Example |
Press <F2> |
Each deposit within a cash account must be identified by a unique number. Any number can be used; they are not issued in sequence. The same deposit number can be used for different accounts; for instance, you could use the six-digit date as the deposit number for each of your bank accounts.
Enter the number of the deposit being prepared, or use the option.
Options
You may use the option:
|
<F2> |
For the current deposit number for this cash account |
If this is not a new deposit, the current total of cash receipts already included in the deposit appears. If the deposit slip has already been printed, Already printed displays.
You can change a deposit even after the deposit slip has been printed, unless you are using PBS Check Reconciliation and the deposit has already been transferred to C/R.
If you change a deposit that has been printed, you must print it again before you can transfer it to the C/R module. There are automatic and manual transfer methods which you may read about in the Check Reconciliation Interface section.
|
Format |
999999 |
|
Example |
Press <F2> |
Starting new deposit. Is this Ok ?
This message appears only if this is a new deposit. Select No to correct a keying error, or Yes if you really intend to start a new deposit. Building two different deposits to the same bank account at the same time would be unusual but is not prohibited.
|
Format |
Graphical mode: Yes/No window Character mode: One letter, either Y or N |
|
Example |
Select Yes |
Enter the date of the deposit. If this is not a new deposit, the date already entered automatically displays and the cursor moves to the next field.
|
Format |
MMDDYY There is no default. The date may be past, present, or future. |
|
Example |
Type 41215 |
Start receipt date and
End receipt date
Specify the date range for the cash receipts you want evaluate for inclusion on this deposit slip. The latest value possible for the end receipt date is the deposit date.
Options
You may use the option:
|
<F2> |
For the Earliest starting date or Latest ending date |
|
Format |
MMDDYY at each field. Neither date may be later than the deposit date in the Deposit date field. There is no default for the starting date; the default for the ending date is the deposit date. |
|
Example |
Press <F2> at each field |
If you are using Character mode go to Select Deposits in Character Mode.
The list box displays the cash receipts that fall within the range entered above.
Up to 12 cash receipts display in the list box. You may sort the cash receipts by receipt date in ascending or descending order. Only column names in red may be sorted. To select or change the sort field, click on the column name or the arrow to the right of the column name or use the View options.
Based on the range entered in the Starting and Ending receipt date, cash receipts display in the list box and are available to include in the deposit.
When entering a new deposit the list box looks something like this:
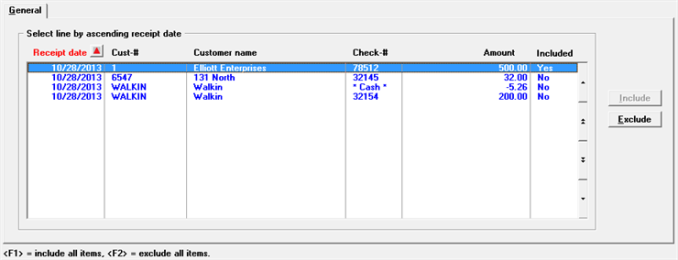
With the focus on the list box the first line is highlighted. Use the up and down arrow keys or your mouse to highlight any other line.


With the line highlighted, when you want to include a cash receipt select the Include button or type <Alt+I>. If you wish to exclude a cash receipt select the Exclude button or type <Alt+E>.
To include all items select <F1>. To exclude all items select <F2>.
As you include or exclude Cash receipts in the deposit the Current total amount, to the right of the Deposit #, changes to reflect what was selected.
When finished select the Exit button to return to the menu.
When finished with the first screen you are at Field number to change ?.
Field Number To Change ?
Make any needed changes.
Note the absence of an <F3> option. Deposit slips remain, even after the deposit slip has been printed and the deposits have been transferred to the C/R module (if used). They can only be purged by running the Cash History report, as described in the Cash History chapter.
Press <Enter>. The following screen appears:

All cash receipts display which:
| • | Are for this cash account, |
| • | Were received within the selected date range, and |
| • | Have not already been included in another deposit. |
If this is an existing deposit, cash receipts which have already been selected are identified by Y in the rightmost column.
The cursor is initially positioned in the rightmost column of the first row, and moves down one row with each entry. It stops when the last cash receipt is reached (there is no Field number to change ?).
Incl
Answer Y to select this cash receipt for inclusion in this deposit slip. Answer N to unselect a cash receipt that is already selected. Press <Enter> to move to the next row leaving the selection status of this row unchanged.
Options
You may use the options:
|
<F1> |
To include all items on the screen |
|
<F2> |
To exclude all items on the screen |
|
<Down> |
Move to next item |
|
<Up> |
Move to prior item |
|
<PgDn> |
Move forward to the next screen of receipts |
|
<PgUp> |
Move backward to the prior screen of receipts |
As items are being included or excluded, the total amount of the deposit is adjusted and appears at the top of the screen.
<F1> or <F2> work only on the items currently displayed. If there is more than one screen, use <PgDn> and <PgUp> to process each screen.
|
Format |
One character, either Y or N |
|
Example |
Press <F1> to include all items. |
Press <Esc> to return to the menu when you are finished making selections.
This selection prints a form of the cash receipt amounts selected in Prepare deposits that are to be deposited in your bank account.
You may print only one deposit slip for one account at a time.
If you are interfacing to PBS Check Reconciliation (C/R), you must print the deposit slip after the last changes are made to it. Depending on the C/R Control information setup, the deposit amount may transfer to C/R automatically or be transferred to C/R using Transfer checks/deposits. For additional information see Check Reconciliation Interface.
Select
Deposit slips from the Deposits menu.
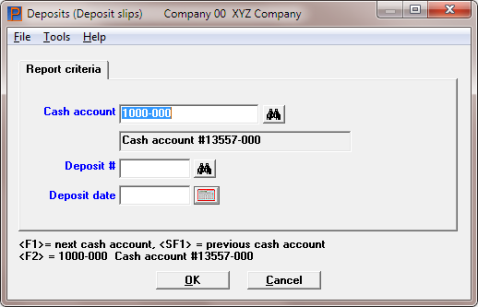
The following screen displays:
Graphical Mode
Character Mode
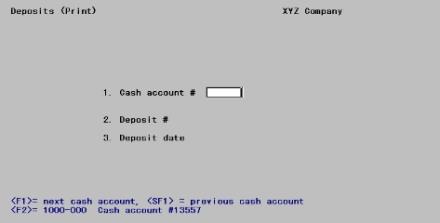
Enter the information as follows:
Enter the cash account number for this deposit. Any valid cash account previously defined in the System Manager (CTL) Cash accounts selection is accepted.
Options
You may use the option:
|
<F1> |
For the next valid cash account. The <F1> and <SF1> entries are not available if only one cash account has been defined. |
|
<SF1> |
For the previous cash account |
|
<F2> |
For the default cash account from Control information |
|
Format |
Your standard account number format, as defined in CTL Company information |
|
Example |
Press <F2> |
This is the number of the deposit for which you want to print a deposit slip. Enter the number or use the option.
Options
You may use the option:
|
<F1> |
For the next deposit for this account. |
|
<SF1> |
For the previous deposit |
You will be informed if:
| • | The deposit slip has already been printed, or |
| • | The deposit has already been transferred to the Check Reconciliation module (if used). |
|
Format |
999999 |
|
Example |
Type 1 |
This is the date you expect to make this deposit. The cursor does not move to this field on initial entry of the screen, but you can change it from Field number to change ?.
|
Format |
MMDDYY The default is the deposit date entered in Prepare deposits. |
|
Example |
Press <Enter> |
Select OK to print the deposit slip or Cancel to return to the menu without printing.
Character Mode
From Field number to change ?, make any needed changes, then press <Enter> to print the deposit. You may be asked to select a printer for the deposit slip, but you cannot display it on the screen or print it to disk.
If you have the C/R module but you are not interfaced to Check Reconciliation, you may also enter cash receipts manually using the Checkbook entries function in C/R or Load checkbook if you do not want them to affect the C/R Distributions to General Ledger.
If the C/R module is presently in start-up mode (refer to the Control Information and Starting up a Checkbook chapters in the C/R User documentation), you do not have to print a deposit slip in order to transfer the deposit.
You can print a deposit slip for any deposit you have not yet transferred. Even if a deposit slip has already been printed, it can still be reprinted at any time.
|
Note |
Returned checks and returned check bank charges are also transferred to Check Reconciliation, but you do not have to print a deposit slip in order to transfer these type of transactions to C/R. |
Per the Check Reconciliation Control information settings you may be setup to transfer a deposit into the C/R Check Book (CKBOOK) one of two ways:
| 1. | Posting automatically when a deposit slip is printed or |
| 2. | Running the C/R Transfer checks/deposits function in C/R to pull the deposit information into the Check book |
In either case you must have the Checking account entered in C/R to match the A/R Bank account you are using for the deposit.
Posting to Check Reconciliation Automatically
If you are automatically posting to Check Reconciliation, a Checkbook Transfer Register is generated after a Deposit slip is printed. The Register will indicate:
Transferred from Accounts Receivable
A Checkbook Transfer Register example can be seen in the Sample Reports appendix.
If you are setup for automatic transfer and you print a deposit slip, but the Checking account has not been entered in C/R, you may elect the manually transfer the deposit after you enter the Checking account in C/R.
Manually Transferring Checks\Deposits
To manually transfer you must run the Transfer checks\deposits function on the C/R menu to pull the data into Check Reconciliation.
After the deposit slip prints, and if it has not already been transferred to the Check Reconciliation module, you are asked whether the deposit slip which was just printed is OK. If it is, answer Y. You can now transfer the deposit to the C/R module.
Using Deposit summary is optional.
The Deposit summary selection enables you to obtain a report showing total transactions on an individual deposit slip or a sequence of deposit slips. This is different than the Print deposit slips function which prints pseudo-forms for individual deposits.
A Deposit Summary example can be seen in the Sample Reports appendix.
Select
Deposit summary from the Deposits menu.
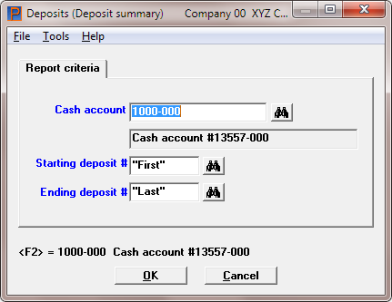
The following screen appears:
Graphical Mode
Character Mode
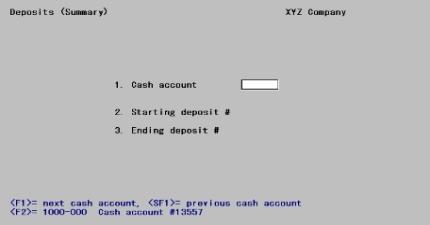
Enter the following information:
Enter the cash account you want to show on the report. This must be a valid entry in the Cash accounts selection of the System Manager (CTL) module.
Options
You may use one of the options:
|
<F1> |
For the next entry in Cash accounts. If only one entry exists, neither <F1> nor <SF1> is available. |
|
<SF1> |
For the previous cash account |
|
<F2> |
For the default cash account from Control information |
|
Format |
Your standard account number format, as defined in |
|
Example |
Press <F2> |
Starting deposit # and
Ending deposit #
Enter the range of deposit numbers to include on the summary.
Options
You may use the option:
|
<F2> |
For the First starting deposit number or Last ending deposit number |
|
Format |
999999 |
|
Example |
Press <F2> at both fields |
Make any needed changes, then press <Enter> to print the Deposit Summary.